Sunday, 23 June 2013

Scouse for all!

I've decided to make Scouse after my trip to Liverpool last weekend. I checked for recipes online to find that they all have one or two ingredients that I'm sure the place I had didn't add to. So I combined recipes from two sources to make my own concoction. So here goes!

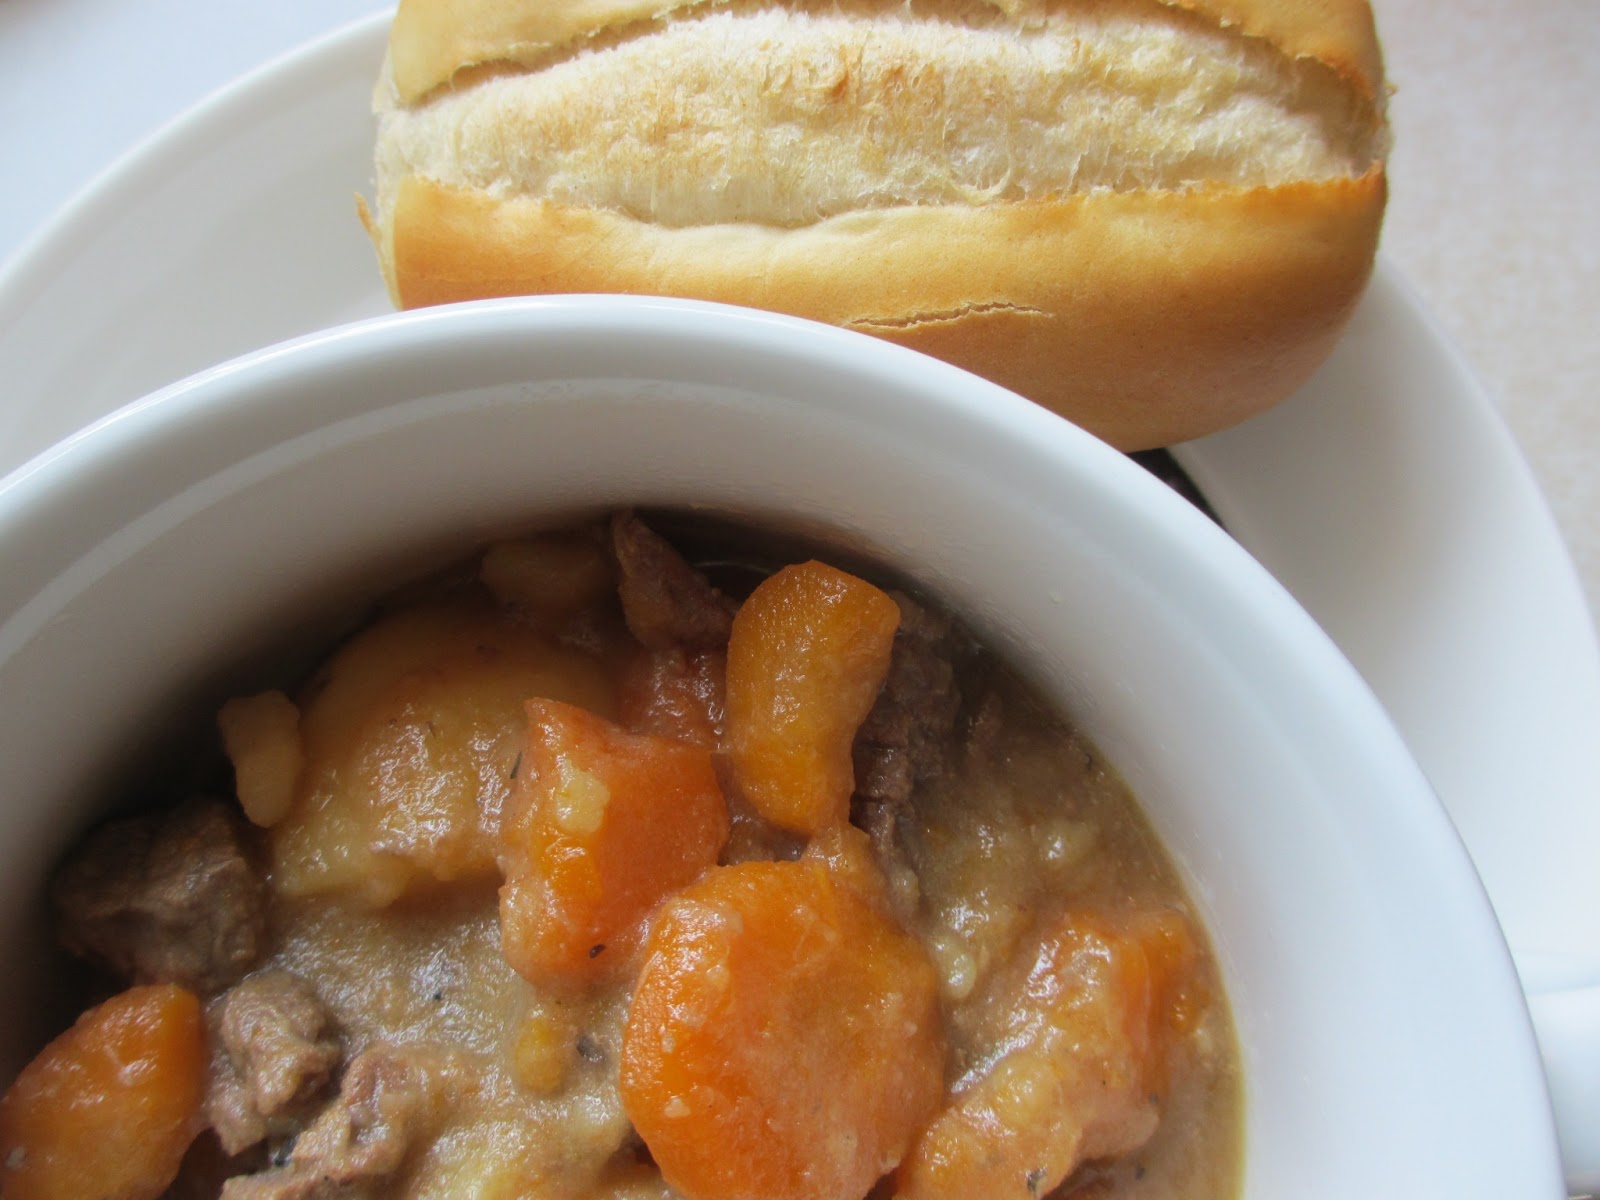
Scouse served with a mini baguette


Ingredients:

450 grams of Stewing Beef, large cubes
2 Tbs of cooking oil (vegetable cooking oil)
Salt and pepper
2 bay leaves
pinch of dried thyme ( few specs)
300 ml beef stock concentrate
200 ml of water
1 large onion, quartered or diced
3 large potatoes, quartered
4 large carrots, chunky slices or large dices (depending how you like it)

Method:

  • Add  generous amounts salt and pepper to taste to the meat. Heat oil to about medium heat. Brown the meat evenly. 
  • Once the meat is browned on all sides tip in the chopped or quartered onions. Cook for 5 mins.
  • Then pour in the stock and water and allow to simmer (mini bubbles) with bay leaves and thyme for 1 1/2 hours with the lid on. If you like you can add a few pieces of diced potatoes to allow to simmer with the meat (this will give good texture to the end of the scouse) 
  • After this step, add the potatoes and carrots and allow to simmer without the lid for another hour. This is to reduce the liquid of the stew. Check every now and again to see that it doesn't dry out. You can add a little water to prevent drying out.
  • Once ready serve in soup bowl with a petite pain.


Tuesday, 27 November 2012

Nasi Briyani - The Malaysian style without the layering

Not the best picture, I also ran out of Saffron
but you could see a speckle of yellow.


Nasi Briyani
3 cups long grain basmati rice, rinsed and soaked for about 20 mins
4 cups water
1 Tbsp corn oil
1 Tbsp butter/ghee
1 tsp of salt (adjust to taste as different types of salt have different intensity)
1 stick 2" cinnamon
1 star anise
5 green cardamon pods
4 cloves
3 cloves garlic, skinned
3 shallots, or 1 medium onion
1 pinch saffron strands (soaked in 2 tbsp hot water) or saffron powder diluted in 2 tbps of water

Method:

  • Heat a pan or a deep cast iron pan (with cover). 
  • Add oil and ghee until uniformed then brown onions in the pan.
  • Once onions are close to being ready reduce heat to low, put in the garlic and spices (except saffron) and stir to fry until fragrant.
  • Drain the rice and pour it into the pan with the onion and spice mix.
  • Increase the flame a little and fry the rice until all the spice is incorporated.
  • Tip water and allow to boil, then bring it down to a simmer and close it with a lid. Then you can choose Rice Method A (No rice cooker) or Rice Method B (Rice cooker)
Rice Method A:
  • Lift the lid to check the texture of the rice (if you press on the rice it will break into three pieces, sort of Al dente)
  • Cover the lid with a tea towel and cover the rice to allow to cook through on the lowest heat.
  • Open the rice in between and tip in the saffron essence in a quick swirl. Turn off the heat and leave the cover on for about 5 mins to allow the rice to absorb the saffron. 
  • With a ladel stir around the rice to create lovely multicolour Briyani rice
Rice Method B:
  • Alternately you could then tip the entire portion into a rice cooker and let it do the rest.
  • You could open the lid to check the progress of the rice and tip in the saffron essence in a swirl and leave it at 'keep warm' or off for a few minutes before fluffing up the rice.
Serve rice with curry of choice.


The above ensemble is Briyani rice with Chicken Curry - Fenugreek Leaves. Thanks to Madhur Jaffrey's Curry Nation. I've included the recipe for Fenugreek Chicken at Good Food Channel.

Alternatively you can find it at my blog with the version I've changed a little:
Chicken Curry with Fenugreek Leaves


Chicken Curry with Fenugreek Leaves


Chicken Curry with Fenugreek leaves


Chicken Curry - Fenugreek leaves

1 Tbsp groundnut oil
1 tsp of Ghee
1 medium onion, finely chopped
1 tsp garlic, finely grated or crushed
1 tsp fresh ginger, peeled and finely grated
700 g boneless, skinless chicken thighs, cut into 2½ cm chunks
4 tbsp canned chopped tomatoes
1 green chilli, finely chopped
1 tsp turmeric
¼ tsp chilli powder
1 tsp garam masala
1/2 tsp salt
A pinch dried fenugreek leaves


Method (adapted from Madhur Jaffrey's Curry Nation)

  • Set a deep  pan over a medium heat. Add the oil and when it’s hot, tip in the onion. Fry for 10 minutes, or until it is light brown, then add the garlic and ginger. Fry for 2 minutes. 
  • Add the chicken and brown for 2 minutes. Put in the tomatoes and green chillies. Stir for 2 minutes, then add the turmeric and ½ teaspoon of salt. 
  • Mix well for 5 minutes before adding the chilli powder and garam masala. Stir and crumble in the dried fenugreek leaves. 
  • Mix in 360ml of hot water, or enough just to cover the chicken, and bring to a simmer. Cover and cook over a low heat for 20 minutes, then serve.
Please go here for the original recipe

Sunday, 4 November 2012

Banana Cake/Bread (as some people want to point out)

The Spotted D*ck! xD


The over ripen banana dilemma is a sad thing. Not if you know what to do with it. I have a few good recipes for ripe bananas or call for ripe bananas. These recipes uses items that you should have readily available in your kitchen cabinet if you cook and if you don't, it's okay to stock up on these items you never know when you may need them again.

What the banana cake looks when sliced.


Banana Cake

120 grams Butter (you can use salted or unsalted)
1 cup of sugar (reduce if you don't like things too sweet, I reduce about 3 tablespoons)
2 Large eggs
1 large very ripe banana (smashed about 150-200 ml)
1 tsp vanilla sugar or vanilla essence
1 1/4 cup of sifted flour (any plain flour will do)
3/4 teaspoon of baking sofa
1/2 teaspoon of salt (omit if using salted butter)

Method:

Cream the butter and sugar until fluffy. Add eggs, one at a time, beating well after each addition. Stir in vanilla to the mashed banana mixture before pouring it into the creamed butter-sugar mixture. Mix well with beater (about 30 seconds would do) Mix all dry ingredients together and sift to the banana mixture. Mix on low speed to prevent flour from exploding all over the kitchen. Pour into a greased loaf pan or a 9x9x2 inch pan. Bake at 180 degrees C for 30 -35 mins. You can test it with a toothpick, if the stick comes out clean it's ready to be removed from the oven. Allow to cool for a few mins and remove the banana cake/bread from the pan and enjoy warm. If you like you can add a dollop of ice-cream or vanilla pudding. It's just amazing!


Sunday, 18 March 2012

Buttermilk Waffles

If you have the Ariete Disney Waffle maker it makes about 12-14 Mickey heads


Ingredients:

Dry Ingredients:
225 ml flour
75 ml - 80 ml cornstarch
3/4 tsp baking powder
1/2 tsp baking soda
30 ml granulated sugar
1/2 tsp salt (use less if using salted butter or omit altogether)

Wet Ingredients:
2 large eggs , separated
250 - 270 ml buttermilk (in Finnish Piimä)
1 tsp pure vanilla extract (if using vanilla sugar add 1 tsp to the dry ingredients)
75 ml unsalted/salted butter , melted

Method:
  • Mix all dry ingredients in a bowl with a whisk. Set aside.
  • Beat egg whites until peak. Set aside.
  • Mix buttermilk, egg yolks and vanilla extract (if using vanilla sugar omit this) and pour it into the dry ingredients.Mix to blend but don't overmix (it's okay to be lumpy)
  • Stir in the melted butter.
  • Fold in egg whites.
  • Pour batter over heated waffle iron and cook according to waffle iron instructions. =)

Red Velvet Cake/Cupcake with Cream Cheese Frosting

Red Velvet Cake or Cupcakes


Red Velvet Cupcakes
with Cream Cheese Frosting! <3


Ingredients:

Dry stuff:

575 ml Flour
345 ml Sugar
1 tsp Baking Soda
1/2 tsp Salt
2-2.5 Tbsp Cocoa Powder

Wet Stuff:
170 ml of Vegetable Oil
230 ml of Buttermilk (Piimä in Finnish, try to find the one that's not fatfree)
2 Eggs
1-2 tsp of red food coloring *I use wilton red paste* (the original recipe asks for 1 -2 Tbsp..sounds a bit much, I just wanted a tint but if you want to make it blood red by all means)
1 tsp white wine vinegar
1 tsp of vanilla extract (again if you're using vanilla sugar put 1 tsp into the dry stuff)

Method:


  • Mix all dry ingredients in a bowl with a dry whisk.Set aside.
  • Pour in buttermilk and mix shortly.
  • Add the oil, white wine vinegar, vanilla (if using the liquid) and red colouring and continue to mix.
  • Finally pour in the eggs and continue to mix well with the whisk.
  • Bake at 175 C degrees for about 25 -30 mins. To test just stick a toothpick or a cake tester. If the stick comes out dry then your cake is ready if not just close the oven and come back in a few minutes and test again with the stick or toothpick.
  • Note if you're baking cupcakes the time needs to be reduced. Depending if you're using fan assisted or not. I'd time it for about 10 mins and then do the stick test. If it comes out very wet then you can let it sit in the oven another 5 mins.

Cream Cheese Topping

Ingredients:
80 grams unsalted butter *room temperature*
200 grams package cream cheese (I used Philadelphia) *room temperature*
150 grams confectioners' sugar (sifted) 
100 ml of whipping cream (whipped to peaks)+ 1 tsp sugar (optional)
1 teaspoon clear vanilla extract (you can use ordinary vanilla extract but it will make the cream a bit more yellowish, alternatively you can use vanilla sugar but it will give the black dots that doesn't make the cream look too nice but tastes fantastic)

Method:
  • Whip whipping cream and set aside.
  • Cream the cream cheese until fluffy
  • Add the butter and vanilla. Cream until incorporated.
  • Add all the confectioner's sugar and continue to whip at high speed.
  • Scoop all the whipped cream into the cream cheese batter and give it a quick beat until smooth.
  • Keep the topping in the fridge for about 30 mins before piping onto the cake.

Note: Make sure cakes are cooled to room temperature before piping the topping on to avoid it from melting. The topping lasts a week in the fridge (because it has cream in it, if you want it to last longer you can omit the whipped cream. I add that because I HATE the sour taste of the cream cheese, the whipped cream dials it down a little)

Carelian Meat Stew (Beef or Pork or both)

Carelian Beef and Pork Stew


Ingredients:

800 grams of stewing beef or pork (or a mix of both)
1 bay leaf
6-8 whole All spice
6 whole black peppercorn
1 tsp -1 1/2 tsp of salt
1 large onion or 2 medium onions (cut in quarters)
2 medium sized carrots (cut into chunks)
1 Parsnip(cut into chunks) (optional)
Enough water to cover the meat

Method:
  • Let meat rest in room temperature for about 30 mins before cooking
  • Place all ingredients in a casserole bowl.
  • Stir to mix well and pour until water covers all the ingredients (it's okay if a little peeks out)
  • Cook in the oven for 250 degrees C for 30 - 35 mins without the cover.
  • Reduce the oven to 175 degrees C and place cover over the casserole and allow the stew to cook for another 2 - 2.5 hours. At this point the liquid should reduced a little.
  • Stir to mix the casserole around before serving.
  • Serve with steamed, boiled or mashed potatoes. Alternatively it's good with wildrice =)
Carelian Meat Stew with Mash Potatoes and
a side of salad

Sunday, 29 January 2012

Fried Glass Noodles with Shrimp, Eggs and Sprouts

Here's something not for the calorie counters. It's simple, delicious and totally unhealthy. If you're planning to go on a diet this noodle is just not for you...(Unless you plan to run a marathon the very next day by all means fire away) I've attached links to images of the products that you could find from your local store. Since I'm in Finland I try to link them to products available at our local Asian stores.

Garnish with Spring Onions


Ingredients

5 pieces of  large shrimp preferable with tail on
1 clove of garlic chopped
1 Large Egg
A handful of bean sprouts
1-2 Tbsp of cooking oil (preferable peanut, maize, rape seed) (pls don't use olive oil or butter!)
1 pack (50 grams) of Mung Bean Vermicelli (Glass noodle, soaked for about 15-20 mins)*
1 tsp of oyster sauce
1 tsp of light soy sauce
1/2-1 tsp of dark soy sauce
a dash of white pepper
optional dash of sugar
optional 2 tsp of Thai chili powder (or the Indian type chili flakes will do too)
optional chopped chives/spring onions (check above picture) for garnishing

Method

  • Put cooking oil in hot wok and add the chopped garlic and chili flakes.
  • Stir fry the shrimp until cooked and then push aside.
  • Break the egg into the cleared area (add more oil if needed) and a dash a little of light soy sauce
  • Once the egg is about 3/4 cooked throw in the glass noodles and add the sauces (light soy, dark, soy and oyster sauce). If you're adding sugar now is the time.
  • If the noodles get a bit clumpy add a little bit of water. 
  • Towards the end throw in the beansprouts and stir for a few seconds before turning off the heat. Let the beansprouts cook in the gentle heat. Now add a dash of white pepper and garnish with chives and serve. =)

Eating with kids

I think a lot of parents agree that at some point it's just impossible to feed your child. No matter how much he/she used to love something, one day they just decide they won't eat it anymore. I've found a way to battle that (at least up to 80% of the time) with making an effort in food presentation on top of taste. I agree it's a lot of work and if you don't enjoy doing things like this it might not be such a good idea. However if you spend some time over the weekend to some simple recipes and ideas that I will share (or try to remember to take a picture and post) over time that might make your kitchen adventures easier and fun, at the same time creating cute edible healthy foods for your children.

Almost the entire clubhouse members are here
in this bowl except Pluto
(Oh god?! How do I know this?! I've been brainwash with my
daughter's obsession to the MMCH)


So I'll start with today's simple lunch. I found some really cool Disney Macaroni from the store a few days ago. What I did was make a minced meat soup with fresh veggies (onions, spring onions, carrots and cauliflower this time) and just toss the macaroni to cook with it. The result was great. It got my daughter eating all the macaroni and then working down towards the cauliflower and carrots. She tried to avoid the spring onions but they get in her system anyways ;).

Peanut Cookies (Fah Sang Peng, Toh Tau Piah)

The ready batch of Peanut Cookies!

Ingredients:

200g finely ground roasted peanuts (If you use a stick blender becareful not to overblend or else you'll end up with peanut butter)
150g plain flour
100g icing sugar/ or fine sugar
1/2 teaspoon baking powder
1 teaspoon of salt (optional if you use salted butter)
2 tbsp of butter (melted, I mean really melted)
50-100 ml Peanut oil (or enough to mix the dough so it sticks, alternatively sunflower or other non fragrant cooking oil can be used *NOT OLIVE OIL*)
1 egg yolk mixed with a tablespoon of milk for glazing
Handful of raw peanuts (halved) for decoration

See how you place the raw peanuts on top of the dough
and glaze over them.


Method:

  • Pour finely ground roasted peanuts into a large bowl.
  • Toss in all the dry ingredients and mix well.
  • Pour in the melted butter and incorporate.
  • Then slowly work in the Peanut oil until you can form small doughs.
  • Bake in the oven at around 175 °C for about 20 mins (if you have a fan assisted oven reduce the heat to about 5 - 10°C, * 300 -330 °F)
Notes: I use 175°C because my oven is somewhat on the warmer side to avoid all my baking goods to get burnt. So experiment a little with your oven. I've seen the range of baking this dessert from 170°C - 180°C with fan assist and without.

Thursday, 26 January 2012

Pineapple Tart

Makes about 24 pieces :)


Ingredients:

Pineapple Jam
150-160 grams of butter (if you're using unsalted butter then put about 1/4 tsp of salt)
200 grams of flour
2 medium egg yolks
45 grams of icing sugar
2 tbsp of cornflour

Preparing to roll my pineapple tarts. The Jam is
filled inside the dough.


Assembling them for baking

I used a scissors to create a 'pineapply' look

Because I didn't have a soft brush, the result was
pressed in unevenly washed pineapple tart :(.


Method:
  • Beat butter and icing sugar until fluffy
  • Add one yolk at a time incorporating it to the butter mixture
  • Finally mix cornflour+flour mixture and blend well
  • Depending on the shape of the tart you can either use a mould or individually make them into little pineapples. 
  • To make them into little pineapples, shape them into a slight oblong shape, use a sharp and tiny scissors to cut into the dough to create pineapple spikes.
  • Brush egg wash over the little pineapples and bake in the oven for approximately 20-25 minutes at 180 °C

Saturday, 21 January 2012

'Mexican' Beef Stew served with Wildrice

Before all my Mexican friends go Ga-Ga this was originally taken from a British Magazine and has been modified. I don't know how 'Mexican' it is but since this was the name given, I'm keeping it as it is ;).
Mexican Stew Beef served with Wildrice-Basmati

Ingredients:

About 1 dl of vegetable oil
2 kg of stew beef (cubed, the bigger the cube the longer it takes to cook)
1 litre of of beef stock
2 tbsp of chipotle chili paste (or Poppamies's vampyyri)
4 cloves of garlic (crushed, although I only smashed them with a knife)
20 grams of grated ginger
1/2 tbsp -3/4 tbsp of ground cumin (it's quite a strong spice you reduce if you don't like it too much but you must use it to give the stew the kick)
1/2 tsp of ground cinnamon
3/4 tbsp plain flour
1-1 1/2 cans of chopped tomatoes
1tbsp of oregano
1-2 cans of kidney beans (if using dry beans you need to prepare this in advance. Pinto beans work nicely too but since kidney beans are readily available from Finnish supermarkets I suggest to just use them. They are tasty anyways.)
salt to taste

The ingredients overview


Method:
  • Heat a small amount of oil in a cast iron pan (if not just a normal flameproof dish). Brown the meat in small batches and set aside to a clean dish. Add a little more oil after each batch to avoid burning and sticking. After all the beef cubes are cooked and set aside.
  • Add onions to cook until caramalized. Then stir in chipotle paste, garlic, ginger, cumin, cinnamon and flour into the onions and cook until fragrant (1-2 mins). Gradually pour in the beef stock stirring constantly. Add can chopped tomatoes and oregano and allow to slowly simmer for 10-15 mins.
  • Gently pour in the beef into the pot, cover the pot and allow to simmer gently from 2.5 - 4hours (depending on the cut of meat) until meat is tender and tears easily.
  • Open the lid and add the beans and allow to boil another 15 mins.
  • If the sauce appears to thin just allow it to continue simmering without the lid. Take a taste and add salt to taste.
Brown in small batches


Fry onions, garlic, ginger, chipotle paste,
 flour, cumin, cinnamon in a little bit more oil.

After all the stock has been added, chopped tomatoes
and meat has been put in the stew will be a bit thin.

This is the finished product after the liquid has been
reduced.


Tip 1: Sometimes the stock is readily salted so you don't have to add any additional salt. If you're using low sodium or saltless stock then you'll need to adjust to taste.

Tip 2:  In this recipe it says caramelize onions, DO IT. Seeing I wanted to get everything into the picture I just dump the onions, grated ginger and garlic altogether. (Don't do this or else you'll have clumpy onions, I'm already regretting. xD)

Tip 3: Poppamies Vampyyri paste is much much spicier than the chipotle paste (that I haven't been able to find at the store but on poppamies's webstore) Vampyyri is sorta similar but the idea is to get the smokey flavor of chipotle into the stew. So if you don't want to end up a fire breathing dragon I suggest you order the paste directly if you can't find it from your local K-Citymarkets.  Poppamies Website

Condiments:

Beautiful Wildrice


This goes well with tacos, enchiladas, tortillas, rice...For today I'm having enchiladas and wildrice

So that there are options for my guests I've decided to buy a ready made enchilada and steam the wild rice seperately.

Wildrice is black in color hence the water will be black when cooked. So if you're planning to do a combo cook the wildrice separately or else you'll get a glob of goo and uncooked Wildrice. Another good thing is that I get to put more Wildrice instead of white like you would normally get from Myllyn paras or Uncle Ben's wildrice mix boxes.

To cook the wildrice:

Soak the rice for about 5 mins and pour away the water. If you're using the microwave (I did), cook the rice for about 18 mins at high heat with a dash of salt. If there is some water left behind it doesn't matter just strain it away. You can mix the wildrice with white race or eat it as it is. It has a nice nutty taste so it goes well with the stew.

If you are boiling, You can add a bit more water, cook at medium-low heat stirring until the grains have expand slightly in size, depending on volume it can take from 20-25 mins. Wildrice is perfect for baking as well.
Roasted Tomato-Bell Pepper Salsa

Roasted Tomato-Bell Pepper Salsa


Ingredients:

1 Bell Pepper
2 Red chillies (seeded or you can leave the seed in if you like it spicy)
1 Green Chilli
2 Tomatoes
2-3 cloves of garlic
1 shallot
1 yellow onion
1 tbsp chopped Coriander
1tbsp of olive oil
1-2 wedge of lime
100 grams can of chopped tomatoes
1 teaspoon of ground cumin
salt to taste

Roasted veggies before blending.


Method:


  • Put Bell pepper, chillies, tomatoes, garlic and onions in a roasting pan with a drizzle of olive oil. Roast until the top is slightly brown and onions are soft.
  • Blend the roasted veggies with a stick blender.
  • Stir in the cumin and salt.
  • Pour the chopped tomatoes and mix well. 
  • Finally put in the chopped coriander and stir. Save some for garnishing.

Friday, 20 January 2012

The wild rice hunt

Wild Rice from Alambique Oy
I ran out of my dear wild rice that I use normally with salads or when I want to give my plain boring white rice a little zing! In Finland this seems like a rarity. The pack I had was from Germany and when it ran out I went on a frenzy hunt. The nutty crunchy taste of wildrice is just fantastic. I've got some red rice that I use from time to time and it's not as nutty flavoured but feels a bit more 'fibery' compared to white rice. With that said, I want to promote this lovely species of rice by introducing a few recipes on here. Some I've gotten from friends and family, some from cooking books I've bought and tested online recipes (I'll try to always link the page but if there are some ingredients not found I'll adapt with local ingredients test it out and post the modified version on my blog)

For those who would like to know what other products Alambique delivers can go visit their website
Alambique Oy

Monday, 18 July 2011

'Wok' Fried Veggies (non asian style)

Ingredients (Should be enough for 3-4 persons):

1 zucchini (some zucchini peels are a bit bitter so if you don't like that take it away :))
1 large carrot (Sliced)
1 medium sized broccoli (cut to bite size)
1 medium sized cauliflower (cut to bite size)
1 medium sized red onion (cut into big chunks)
1 pepper (any colour you desire, cut into chunks)
A few champ mushrooms sliced
1 clove of garlic (minced)
1-2 tbsp of Olive oil or any Veggie oil
Herbamare - Herb seasoning
Marjoram (Meirami)

Optional:
a teaspoon of butter
(You can add other veggies to your liking for example daikon, radish, celery (these are good raw so quick stir fry works as well))

Tip: If you don't like crunchy carrots you can steam or boil them before hand with the cauliflower. Roughly 10 mins-15 mins.

Method:

  • Heat oil and fry onions with garlic until fragrant (beware they burn easily if you use too high heat)
  • Throw in the mushrooms, zucchini and pepper then toss it around until it gets some colour.
  • Throw in the carrots and cauliflower and continue stiring. Lastly the broccoli and any remaining veggies and toss until it achieves some color. Then spice it up with some herbamare seasoning and Marjoram.
  • If you're adding the butter do so now and then cook to how you desire your veggies (I prefer them al dente but when I cook for my daughter it has to be a bit well done as she's lazy to chew.).
Notes: The word 'wok' is used as most pan fried toss veggies are called wok veggies...I don't use a wok, just a simple Tefal pan will do. The deeper the better so that you can easily stir it around, so don't worry about getting a wok. Even a cast iron pan will do =).

Here's what the Herb Seasoning Looks like from the Finnish stores...and it's not thaaat expensive =) (Only if you buy a couple of kilos <_< )


Tuesday, 19 April 2011

New recipes for April

I have a few recipes coming up by request I'll have to write up and post. Since I don't have pictures it irritates me. I can guarantee that this post will look boring >.<":
  • Banana Cake
  • Fried Glass Noodles
  • Vegan Friendly Chocolate Mousse Cake (Photo Missing)
  • Tom Yum Goong (Sour and Spicy Thai Soup with Shrimp/Prawns)

17th July 2011 -

I've been a bit lazy but I assure you I'll get this updated as soon as I'm on holiday and I don't have a two year old testing my patience day in day out so that I find some peace and time to do it.

I'm adding one more recipe here for a friend who would like some summery veggie recipes =)
  • 'Wok' fried summer harvest! =)

Monday, 28 March 2011

Indian Muruku Snack

Muruku


Ingredients

2 dl Rice flour
1 dl Urid Flour (Black dahl flour)
1 dl Besan/gram flour (Chickpea flour)
1 dl butter/margarine (salted or unsalted) (soften at room temperature)
1- 1 1/2 dl water to knead
2 tsp of red chili powder (use indian chili powder)
1 tsp of white cumin seeds (whole jeera)
2-3 Tbs of Sesame seeds (or as much as you desire, can be omitted if allergic)
1 tsp of salt (if using salted butter...if not then add a small dash more...not too much!)
1 pinch of Asafoetida powder (optional)
Oil for deep frying

Method

  • Put all dry ingredients in one bowl and mix them (Rice flour, Urid flour, Besan Flour, Red chili powder, cumin seeds, sesame seeds, asafoetida (if using) and salt.
  • Add the soften butter into the dry mixture and pinch in to mix.
  • Add water a little at a time to form a soft dough.
  • Heat oil on mediu,.
  • Place a lump of dough into a Muruku Maker(this is as close as it gets). Using the single star pattern, press out the muruku dough in a spiral shape on a lightly greased plate or directly into hot oil (only attempt this if you know what you're doing!)
  • Fry until the murukku is light golden brown in color
  • Place murukus over newspaper or kitchen paper towels to drain excess oil
  • Allow the murukus to cool before serving.
  • Store the muruku in an air tight container (should be consumed within a week)

Friday, 25 March 2011

Baking out of a new book

Junior's Cheesecake Cookbook: 50 To-Die-For Recipes for New York-Style Cheesecake


In the near future I'm going to be making some delicious looking Cheesecakes out of Junior's cookbook. I got the book from a friend who came to visit me and brought this book along with her. I bought the book along with some other stuff from Amazon and since most of the items were not shippable to Finland hence this was why I had my friend bring this over. I'll post a few photos of the cheesecakes as well as my feedback on how it turned out. If you can't wait, go get your own copy from Amazon! ^^ (Ps: Yes I'm testing out all sorts of way to monetize my website!)

Friday, 21 January 2011

Marble Mascarpone Cheesecake (cookie base, baked)

Marble Mascarpone Cheesecake


Ingredients:

Cookie Base:

120 gr -130gr digestive biscuits (crushed, or I just use a coarse blender to smash it to pulp)
30 gr sugar
65 gr butter (melted)


Cheesecake batter: 

70g bittersweet chocolate chopped     } To be melted
5 Tbsp water                                      }  and mixed together
1 pack (250 gr) Mascaporne cheese
1 pack (200gr) Philadelphia Cream cheese
170 gr sugar
50 ml of heavy cream + 1 Tbsp of cornflour (optional)
4 eggs
1 tsp vanilla extract or 2 tsp of vanilla sugar


Method:
  • Prepare a 24 cm springform pan with baking sheet and butter well.
  • Melt butter in microwave at low heat. Crush the digestive cookies and add sugar. Mix well with melted butter and press evenly into a prepared pan.
  • Bake in the oven at 160°C-165°C for about 10 mins. Once ready remove from oven and fill the deep baking tray with hot water about 2 cm high.
  • Prepare a bain marie for the chocolate and water (or just boil some water and place a smaller pot over to melt the chocolate with the water. YES melt them together!) Set the mixture aside to cool.
  • Now prepare the cheesecake filling by using a mixer.
  • Beat the cream cheese with the sugar and vanilla until smooth. Then add the mascarpone and beat until smooth. If using cream beat in the cream and sieve in the cornflour and continue beating until smooth.
  • Add eggs one at a time beating into the batter until even and smooth ;) (yes...smoooooth ;))
  • Ladle about 1/10 of the batter into the chocolate mix and fold until ...yes you guessed it...smooth!
  • Now pour the vanilla batter on to the cookie base. Then pour the chocolate batter over the vanilla base. Use a fork to create swirls or marbley effect.
  • Cover the bottom (halfway up is enough) of the springform pan with aluminium foil to prevent water from getting into the cookie batter. Place the pan on top of the water (this baking is called the warm bath method) and bake at 150°C for about 1 hour (if you're using fan assisted check sooner so that the cheesecake doesn't brown...like mine :( )

Notes: 22nd January 2011: A friend suggested to use round cylindrical rod like the handle of a wooden spoon to give better swirl patterns. As I didn't have anything cylindrical available I used a fork. I'd take his advice!

Tuesday, 11 January 2011

An early dinner this Saturday

I'm planning a weekend special of my own version of Chinese dinner. Back when I was in Malaysia my grandma would sweat away in the kitchen to prepare our favorite dishes. We kids were so spoilt we would rather go out and eat at McDonald's than enjoy a good home cooked meal. Now I miss everything she's done for me. I sort of regret not enjoying it more while I was back home. I never imagined I'd be living in a country where getting decent Asian home cooked meal was like winning the lottery. The little things like fresh popiah skin (spring roll skins), fresh laksa noodles, fresh egg noodles, beansprouts, soya sauce (thin or dark), chillies and other fresh produce that makes great Asian cooking.

I am happy that we do have a couple of good Asian stores in Hakaniemi that import these fresh produce for me to make the food at home. It's alot of work but when you're desperately wanting to eat something that's not readily available you'll slave in the kitchen to make it work. I'm not the best cook in the world and I get away with making 'close-to' tasting food. So keep watching this space for my ridiculous recipes! I'm also going to venture and write a review on the asian stores in Finland, well the ones I go to anyways. I do have my preference but I'm not going to be bias. If they allow me to write a story on their store I'll be happy to share my findings :).

Anyhoo...This weekend I'm going to be making chicken-crabmeat soup (thick cornstarchy with egg type ;)) and serve fried siew pak choy, fried fish with ginger-garlic-chilly-soy sauce, black pepper beef and a four veggie stew with sausages xD (This is because my daughter loves the preservative free sausages I buy and I thought since we are having guests I'm going to spoil her a little, maybe the little guests would like these too). I'll serve all this with Jasmine rice and red rice mix. Does it sound yummy? ^^ Alright! you know how I hate writing my blog without photos but since I had been ill the past few weeks that I haven't been in a picture taking mood. However I'm going to take photos of what I'm serving this weekend, hopefully they'll be presentable and on top of that tasty. I can't help myself so I'm going to entertain you with a photo of my dearest Alyssa who's all poofed cleaning grandma's floor during Christmas! xD Oh the drama queen xD!

Alyssa all tired cleaning xD